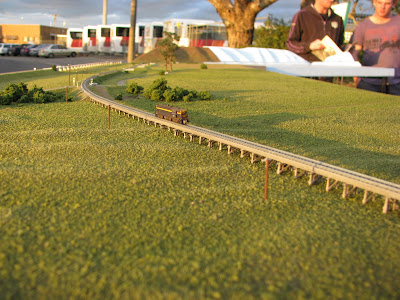
The crossing signs and telegraph pole line were constructed from scrap rail and brass shim soldered together. Pretty amazing ey??!!
Tuesday, August 23, 2011
MONSTER Progress!!!
Not much to say with the latest set of photos. We'll let the pictures do the talking. ENJOY!!
Thursday, July 28, 2011
Finally TRESTLE BRIDGE TIME!!!!!
Gday All!!
Work has begun on the star of the layout, well the shorter one at least. Paul has built the bridge surprisingly quick, over just 3 evenings after work!
He used 0.9mm tee tree for the uprights and north-eastern hobby timber, that he then had to cut even thinner again, for the cross sections. The shallow end, near the road crossing, is shortest on the layout at 3mm high.
Progressing to 3.5, 4, 4.5, 5 & 5.5mm at the deepest end. Every trestle bent variation is in order and as per the real bridge, being modelled strictly of photos. The majority of the large bridge is 5.5mm to 7mm deep. There is 38 piers in this bridge and 157 in the large bridge!!!!
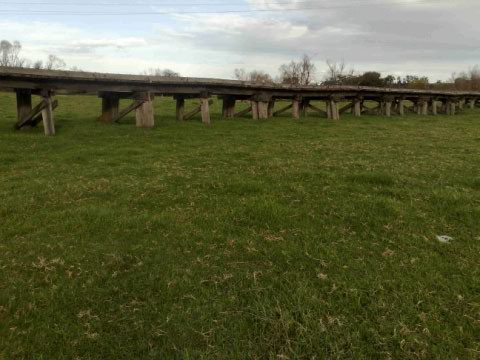
Firstly here are two photos of the actual location. These photos assisted in the construction of the piers.


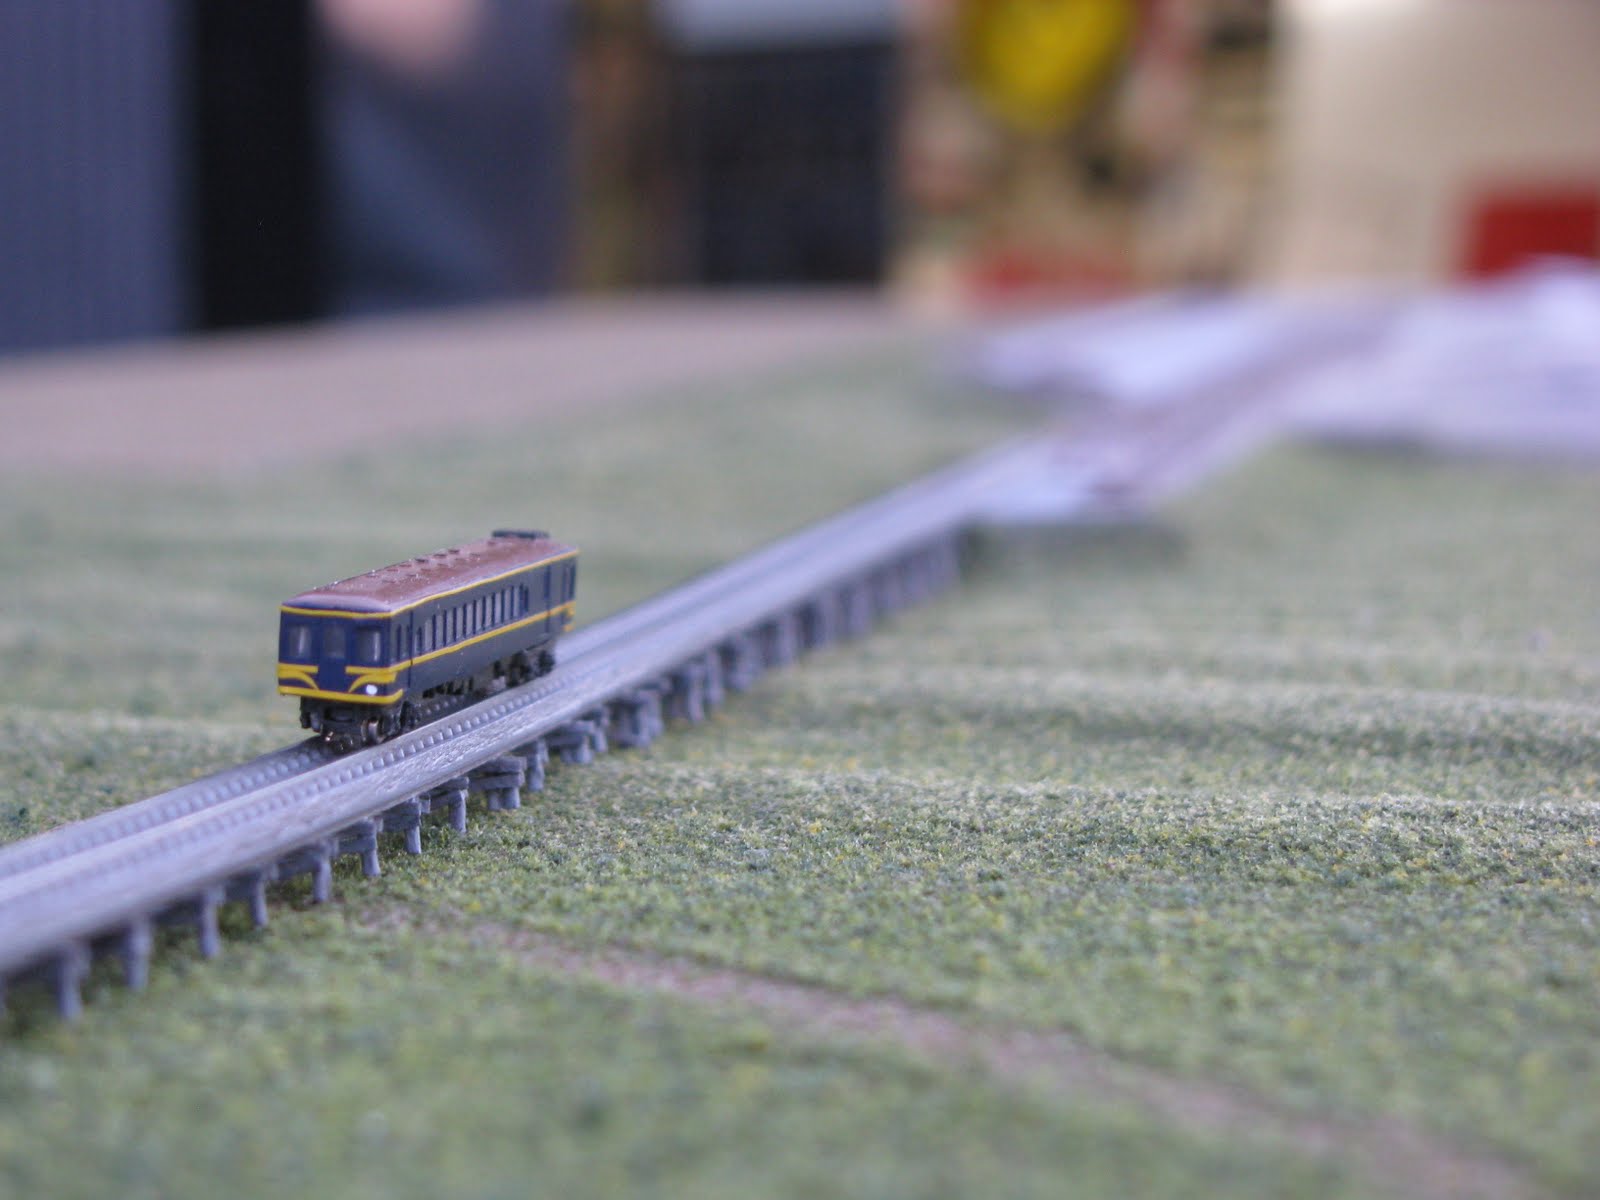
A close up photo showing the huge amount of detail put into such a small structure.


Here is a photo of the bridge prior to attaching it permenantly to the layout.

Paul has also been working on the hill overlooking the Snowy River valley. This is the first of many steps involved in creating this area.
Work has begun on the star of the layout, well the shorter one at least. Paul has built the bridge surprisingly quick, over just 3 evenings after work!
He used 0.9mm tee tree for the uprights and north-eastern hobby timber, that he then had to cut even thinner again, for the cross sections. The shallow end, near the road crossing, is shortest on the layout at 3mm high.
Progressing to 3.5, 4, 4.5, 5 & 5.5mm at the deepest end. Every trestle bent variation is in order and as per the real bridge, being modelled strictly of photos. The majority of the large bridge is 5.5mm to 7mm deep. There is 38 piers in this bridge and 157 in the large bridge!!!!
Firstly here are two photos of the actual location. These photos assisted in the construction of the piers.


A close up photo showing the huge amount of detail put into such a small structure.
Here is a photo of the bridge prior to attaching it permenantly to the layout.
Paul has also been working on the hill overlooking the Snowy River valley. This is the first of many steps involved in creating this area.
Sunday, July 17, 2011
And now we have COLOUR!!!
Gday all,
We would first like to welcome and thank our new blog followers. We appreciate all the kind remarks from the Morwell Model Railway exhibition and various forum.
Progress on the layout has been delayed slightly due to Paul working on a VR 5" L class locomotive (pictures of this will soon appear on the 5" blog).
We assure you that Orbost is still underway. The following pictures are evidence of this.
We would first like to welcome and thank our new blog followers. We appreciate all the kind remarks from the Morwell Model Railway exhibition and various forum.
Progress on the layout has been delayed slightly due to Paul working on a VR 5" L class locomotive (pictures of this will soon appear on the 5" blog).
We assure you that Orbost is still underway. The following pictures are evidence of this.
This photo demonstrates the effort Paul has put into this area. The undulation of the land is more defined and the colours and textures of the ground layer are spot on!!
Looking towards the train as it moves along the land fill in between the two bridges. The road still needs surfacing and shrubs and trees added.
This photo shows the third module. GPS and visits to the area were used to model this hill as accurate as possible. The closer hill is almost ready for ground surfacing to match the second module. New information has recently been obtained showing an error in the hill in the background. This hill will be replaced with the correct one.
Overall shot showing the colouring of the two modules. Very fine coloured foam was used in conjuction with half water half PVA glue. to create this layer.
Wednesday, June 1, 2011
Soooo much Detail!!!!
Gday All.
I knew I would be uploading the blog soon. I wasnt thinking this soon!!!
Paul has been making good use of his spare time and putting some serious hours to make some incredible progress.
The following photo shows the sculpting of the hill on the last module to match the existing section. GPS, photos and visits to the location enabled Paul to model this area as accurate as possible.

It never ceases to amaze me how small T gauge is!!!
I knew I would be uploading the blog soon. I wasnt thinking this soon!!!
Paul has been making good use of his spare time and putting some serious hours to make some incredible progress.
The following photo shows the sculpting of the hill on the last module to match the existing section. GPS, photos and visits to the location enabled Paul to model this area as accurate as possible.

It never ceases to amaze me how small T gauge is!!!
Wednesday, May 25, 2011
MORE ORBOST!!!
Gday All!!
WOW!! Paul has been living and breathing Orbost these past days. The following photo is proof of this. Just look at the amount of preparation work involved!! Paul traveled to Orbost with a GPS and the Google Maps printout to mark elevations and land detail on the print for as much accuracy as possible.
This hill will continue onto the third module. The railway will continue at the base of the hill for a short while before slowly climbing towards as it approaches the end of the module. These pictures will be posted in the next update.
The first module gets its MDF edging. I just love the land formation from all the angles taken so far. The edges have now been painted matt black and will have a black curtain to the floor drawing attention to the layout. A brown-grey was painted as a base before the sifted dirt and green ground foams are applied. Note the elevation change in the MDF towards the bottom left of the photo. This displays where the highway passes and forms the edge of the layout. This was done to capture the feel of viewing the railway as if driving along the road encouraging viewers to look across the layout.
Monday, May 23, 2011
Orbost progressing VERY fast!!
Greetings All!!
Its been a while since my last update. Unfortunantly ive been having issues with my intenet at home. In the mean time Paul has been putting a LOT of time into Orbost. This involving two trips to the actual location which is around a SIX hour round trip!!! The reason for these trips as you will see in the following pictures.
This first photo shows the progress made in the station area. The white styrene shows the road formation. During the trips many notes were made and photos taken detailing the geography of the land including water courses and distances.

In this photo Paul is demonstrating the length of the second, larger bridge. This photo also demonstrrated the use of the Google Maps overlay to ensure accurate scaling.

This photo Paul is demonstrating the length of the first smaller bridge just heading out of the station. I tried to capture the amount of work Paul has put into land formation. A lot of work has been put into this area of the layout.

This is the start of the larger bridge where landfill meets trestle. During floods the water rushes under this bridge and erodes the land underneath.
Its been a while since my last update. Unfortunantly ive been having issues with my intenet at home. In the mean time Paul has been putting a LOT of time into Orbost. This involving two trips to the actual location which is around a SIX hour round trip!!! The reason for these trips as you will see in the following pictures.
This first photo shows the progress made in the station area. The white styrene shows the road formation. During the trips many notes were made and photos taken detailing the geography of the land including water courses and distances.
In this photo Paul is demonstrating the length of the second, larger bridge. This photo also demonstrrated the use of the Google Maps overlay to ensure accurate scaling.
This photo Paul is demonstrating the length of the first smaller bridge just heading out of the station. I tried to capture the amount of work Paul has put into land formation. A lot of work has been put into this area of the layout.
This is the start of the larger bridge where landfill meets trestle. During floods the water rushes under this bridge and erodes the land underneath.
Saturday, May 7, 2011
ORBOST!
Intruducing Orbost. This multi-module exhibiton layout is a scale representation of the yard and impressive trestle bridge that used to exist many years ago. Although the bridge still remains, the station and yard area are almost unrecognisable.
Located in on the Snowy river flooldplain in east Gippsland, Victoria, this was the terminus station that serviced a large area. There were plans for the railway to proceed further east and possibly into New South Wales however sadly this did not occur and like many other stations of its kind, slowly deteroirated and closed down. The railway currently stops at Bairnsdale however the formation to Orbost is preserved in the form of a RailTrail (http://www.railtrails.org.au/).
That is why this layout is so exciting. Lots of research has been undertaken to ensure the layout captures the feel and detail of the area. One of the resources used is Weston Langford's website (http://www.westonlangford.com/).
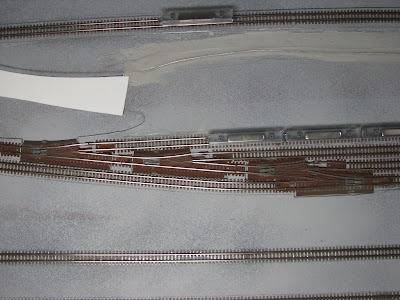
This photo shows the amount of customisation required in the point work to get the track closer to each other like the prototype. The track was also masked up and sprayed to resemble rusty track.
This photo attempts to show the size of the station module. There is a smaller trestle immediately out of the station. There are two more modules, one for the long trestle bridge and the other for the long climb out of the floodplain.
Located in on the Snowy river flooldplain in east Gippsland, Victoria, this was the terminus station that serviced a large area. There were plans for the railway to proceed further east and possibly into New South Wales however sadly this did not occur and like many other stations of its kind, slowly deteroirated and closed down. The railway currently stops at Bairnsdale however the formation to Orbost is preserved in the form of a RailTrail (http://www.railtrails.org.au/).
That is why this layout is so exciting. Lots of research has been undertaken to ensure the layout captures the feel and detail of the area. One of the resources used is Weston Langford's website (http://www.westonlangford.com/).
The site that has been most useful in the project so far would be Google Maps. Screen shot were taken and scaled to resemble 1:500. These shots were then pieced together using signwriting software, printed to scale onto signwriting vinyl and attached to foam. This was used as a base for scaling and sizing of the modules. I will post a photo of this at a later date.
This photo shows the amount of customisation required in the point work to get the track closer to each other like the prototype. The track was also masked up and sprayed to resemble rusty track.
This photo attempts to show the size of the station module. There is a smaller trestle immediately out of the station. There are two more modules, one for the long trestle bridge and the other for the long climb out of the floodplain.
Tuesday, August 17, 2010
VR Flat Top T Class
Everything except the bogies and couplers on this locomotive are scratchbuilt. The handrailwas are 6-thou brass wire and the steps are hand cut and are glued from 5 thou syrene. The chassis is made from 40 thou (1mm) styrene, the body 10 thou styrene, and the fuel tank hand carved lead . The next group of locos Paul intends to use power pickup bogies and light locos. The Series 3 T is being built now and the VR Y class is next.

The hand-painted VR is located in a 0.7mm circle on each end of the locomotive.
The Series 3 Chassis, Series 1 T and DERM.
The hand-painted VR is located in a 0.7mm circle on each end of the locomotive.
Subscribe to:
Posts (Atom)